Microsoft Information Protection (Pureview)

Introduction:
One concern with data you might have is labeling or applying a pre-configured set of permissions or encryption on documents. Imagine a very confidential file or email slips out of a VP's One Drive to someone not having clearance for that type of information. The problem here is that both of them might still be unaware, and even worse, the recipient of that file could fall into the trap of further continuing the distribution of such an important document to people that should not have access to it. Simply because he is unrestricted, and he has no visual aid to tell him that the document is not intended for sharing.
MIP (Microsoft Information Protection) is the tool from Pureview (purview.microsoft.com) that can help implement a strategy for files and emails.
Find yourself a strategy!
The first step would be to check with your legal team, and your compliance officer what are the data classifications you need specifically. Maybe you are in a business line that requires a very specific set of data classification. (ie. Banking or health, working with user pii data)
I'll assume you are an average business with an average usage type of documents. For that, I would propose to have a maximum of 4 labels, out of which one is the default, 3 of the 4 only apply markings on the files, and the 4th also applies encryption/sets a permission level.
In my example I'll use:
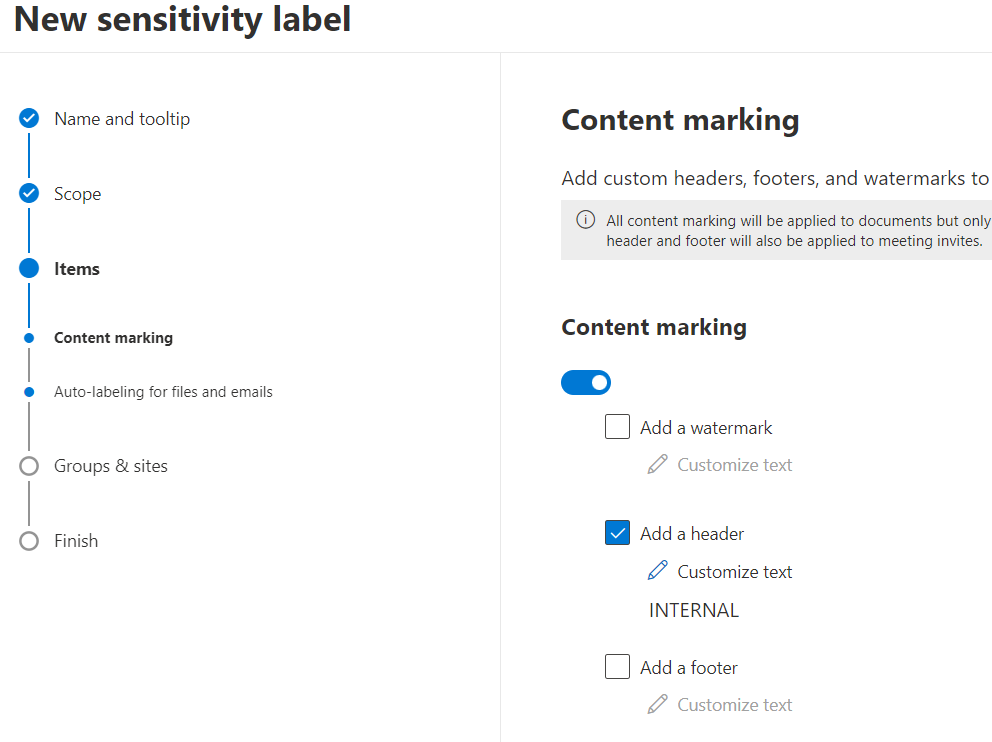
- Internal (applies a marking, is applied by default)
- Restricted (applies a marking)
- Confidential (applies a marking)
- Top secret (applies marking + encryption/permissions)
Why only one with encryption? Because there are scenarios where configuring encryption/permissions makes it very difficult to use the files, especially if you have situations in which the recipient is external and has a non-Microsoft account (yahoo, Gmail), and he's not a guest in your org. That's a small percentage of the population, but nonetheless a possible scenario.
MIP works by having:
- labels
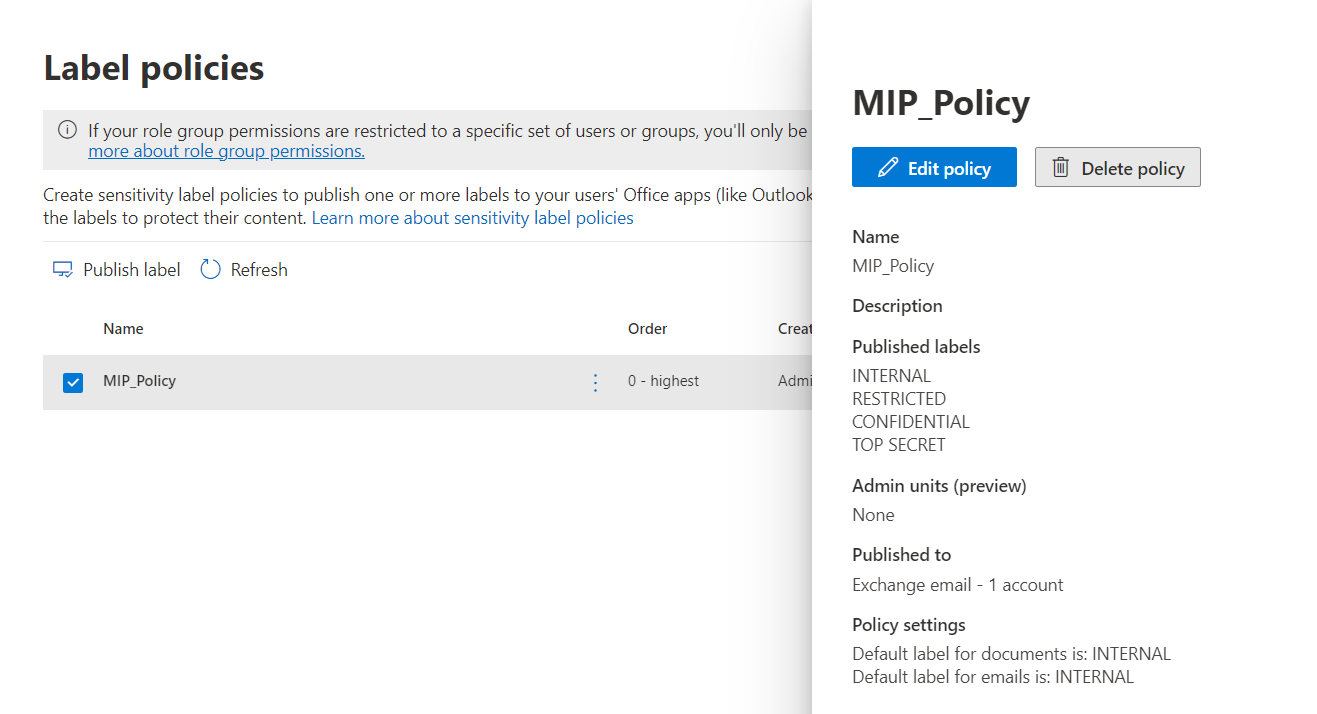
- policy
The labels define to what they apply:
- files/documents
- emails
- both
They also define the behavior:
- any markings on the file/email (header, footer, or watermark)
- encryption/permissions (preset or let the users decide for each use case)
- there are some advanced settings for auto-labeling and other stuff, but for a simple/working setup I would not necessarily reccomend it.
Policies do 2 things:
- are a collection of one or more labels
- decide to which group we assign the policy to. (note! The group needs to be a mail enabled group, so DL, mail-enabled security gr, or M365 group. Simple security groups don't seem to be shown in the picker).
Let's see in detail how they look!
Create the labels (link):


- I'll do the same for 2 other labels. For the last, as said I'll configure user-defined encryption.

If you need different behaviors in different Apps (marking placement to be different depending if you are in a PowerPoint document vs Excel document, vs Word etc.) you can use PowerShell to configure that. Also through PowerShell you can define more custom colors using the hex code. The gui only offers 4-5 available colors.
Once applied, you will have to allow 24h-48h for propagation until it will show up in the user's Office applications.
There are 2 clients available. At the moment of writing this article, there is a built-in client available by default in all Office Apps, and there is also the possibility to install the AIP client which can offer some extra options related to documents on the disk.
Conclusion:
Hopefully this article has helped you navigate the basics of Pureview MIP, or at least understand where to start your journey with this. The most important step in my opinion is not to over-complicate the implementation and be on board with your internal requirements for this compliance feature.
