Outlook Room Finder, Room Lists and how to use them


Introduction:
Assuming you work in a place that has a physical building, that building having meeting rooms, and you/your users are using Exchange Online (O365), then you've come to the right place in order to refine the usage of those rooms, digitally.
You need:
- Room mailboxes created in O365
- A strategy to name/arrange/categorize the rooms
- Room lists and characteristics/details configured on the rooms themselves
Create Room mailboxes in O365:
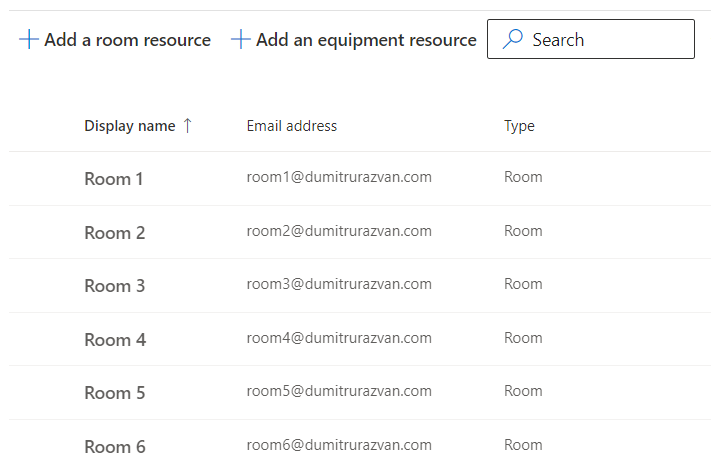
This one should be straight forward. Jump to the Exchange Admin Center -> Ressources and create the room mailboxes.

You can create a Room Resource or an equipment resource. The latter being used more for stuff like a projector, a shared company car etc. that people can book in advance and use in a shared fashion, but could be whatever shared "equipment". I'll create a few myself in my test tenant so we can do some tests.
The Strategy:
This one is all about how you name them, what display name you configure on them and how you plan on using them in Outlook Room Finder. This Room Finder Feature in Outlook was buit to specifically help users in booking appropriate rooms for their needs in both size, level of equipment (Video capabilities, Audio etc.) and geographic proximity.
- The preffered option would be to arrange them by City if your organization has presence in multiple locations.
- Another option (or if the org is in just one city) would be to define the room lists as floors although there are plenty of parameters for defining floor.
- On that note, I've seen implementations where the Floor and Capacity are baked into the actual name and SMTP address of the mailbox. Say for example room.blue.floor1capacity4@domain.com and straight away you know that's on floor 1 and it has a capacity of 4.
- Also, since I've mentioned it - it's not a bad idea to name your rooms "room." this may greatly help you when creating Dynamic Groups or licensing users and excluding rooms from those groups (or exclude them from MFA CA Policies, or other stuff).
This being said, I'll go with the first option as it is the recommended way, and I'll pretend I have rooms in 2 cities: New York and Los Angeles!
Room lists and Details:
Room Lists are just fancy Distribution Lists that can help us organize them. In order to create these we'll have to go in PowerShell, Connect to Exchange Online then run the following:
New-DistributionGroup -Name "New York Rooms" -RoomList
New-DistributionGroup -Name "Los Angeles Rooms" -RoomList
Then add the members as you would add users to a regular distribution group:
Add-DistributionGroupMember -Identity "New York Rooms" -Member "room1@dumitrurazvan.com"
...
Now let's add some details related to those rooms:
Set-Place -Identity "room1@dumitrurazvan.com" -Building NY -Floor 1 -City 'New York'
Set-Place -Identity "room2@dumitrurazvan.com" -Building NY -Floor 2 -City 'New York'
Set-Place -Identity "room3@dumitrurazvan.com" -Building NY -Floor 3 -City 'New York'

Set-Place -Identity "room4@dumitrurazvan.com" -Building LA -Floor 1 -City 'Los Angeles'
Set-Place -Identity "room5@dumitrurazvan.com" -Building LA -Floor 2 -City 'Los Angeles'
Set-Place -Identity "room6@dumitrurazvan.com" -Building LA -Floor 3 -City 'Los Angeles'
You can then use the following cmdlet to see the Room's details:
Get-Mailbox -RecipientTypeDetails RoomMailbox | Sort DisplayName | Get-Place | ft DisplayName,City,Building,Floor

Now these are the most important details you could input, but there's a whole list available on the Set-Place cmdlet. (GeoCoordinates, videodevicename, AudioDeviceName, Tags and all sorts of options that can appear on the Outlook Contact Card, and some of them even in the Room Finder as helping icons).
Please allow 24hrs for these to replicate to Outlook.
NOTE! If you have on-prem synced identities (including your room mailbox accounts), the City attribute is synced from on-premises and you won't be able to set it from the cloud PWS. So the above -City parameter on the Set-Place cmdlet won't work in this scenario. Instead, you will have to populate it on the on-prem object. The Attribute holding it is "l"
The results:
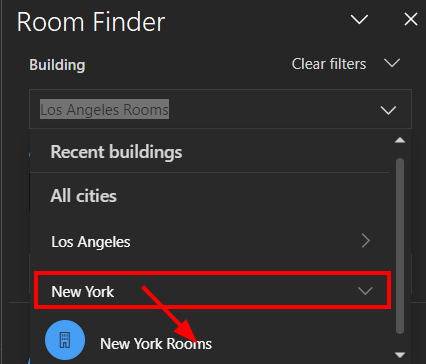
When clicking on the Room Finder, we see the Building Filter which is the City:

So if you have multiple Cities configured, it will automatically create multiple entries based on that.
Then, when expanding one of the Cities, you can see the Room List (New York Rooms for example):
And when you select that, you will see the rooms from that City, and from that Room List:
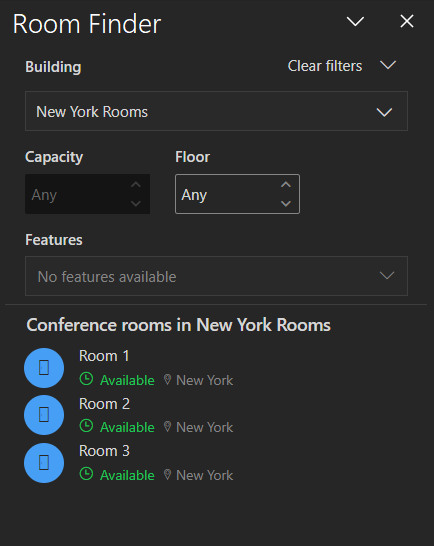
You can also filter by Floor, Capacity, or Features (Video, Audio etc.) if you've configured them, and if they've replicated.
Useful PowerShell cmdlets:
If you want to see what are the available Room Lists via PowerShell:
Get-DistributionGroup -Filter '(recipienttypedetails -eq "RoomList")'
If you want an export with all rooms and some of their details (you can add/subtract as per your need):
Get-ExoMailbox -RecipientTypeDetails RoomMailbox | Sort DisplayName | Get-Place | Select DisplayName, Building, Floor, City, AudioDeviceName, VideoDeviceName, DisplayDeviceName, IsWheelChairAccessible, Tags | Export-csv -NoTypeInformation -encoding UTF8 -Path "C:\Rooms.csv"
An export of all room mailboxes and their most important properties:
# Define the output CSV file path
$outputCsv = "C:\RoomMailboxes.csv"

# Get room mailboxes
$roomMailboxes = Get-Mailbox -RecipientTypeDetails RoomMailbox

# Initialize an array to store the results
$results = @()

foreach ($mailbox in $roomMailboxes) {
    # Get details from Get-Place
    $placeDetails = Get-Place -Identity $mailbox.PrimarySMTPAddress

    # Get details from Get-Mailbox or Get-ExoMailbox
    $mailboxDetails = Get-Mailbox -Identity $mailbox.PrimarySMTPAddress

    # Create a custom object with the required properties
    $result = [PSCustomObject]@{
        PrimarySMTPAddress = $mailbox.PrimarySMTPAddress
        DisplayName        = $mailbox.DisplayName
        Capacity           = $placeDetails.Capacity
        City               = $placeDetails.City
        Building           = $placeDetails.Building
        Floor              = $placeDetails.Floor
        Location           = $mailboxDetails.Office
    }

    # Add the custom object to the results array
    $results += $result
}

# Export the results to a CSV file
$results | Export-Csv -Path $outputCsv -NoTypeInformation

Write-Output "Room mailbox details exported to $outputCsv"
Other Useful cmdlets:
- Set-Place to configure details on the Room mailbox
- Add-DistributionGroupMember / Remove-DistributionGroupMember to add/remove them from Room Lists
- Get/Set-Mailbox, Get/Set-CalendarProcessing, Get/Set-MailboxCalendarConfiguration for generic Room Mailbox settings.
Conclusion
Using room lists and populating the room details on your rooms by following a simple strategy can offer great advantages to your users whenever they need to book one, as their selection and filtering options will be vastly increased.